Pages

Wednesday, 30 May 2012

OBIEE 11.1.1.6 Windows service on Server 2008 64

Service install on OBIEE 11.1.1.6

To get your windows services to run properly under Windows Server 2008 64bit, you need to:
  1. make some small configuration changes.
  2. set-up a log file destination
  3. create the service.
Configuration changes

Edit the following files assuming that your Weblogic in stall is in D:\OBIEE11G.
D:\OBIEE11G\wlserver_10.3\common\bin
Edit  commEnv.cmd
Change the memory setting for MEM_ARGS

:sun
if "%PRODUCTION_MODE%" == "true" goto sun_prod_mode
set JAVA_VM=-client
set MEM_ARGS=-Xms32m -Xmx200m -XX:MaxPermSize=128m -XX:+UseSpinning
set JAVA_OPTIONS=%JAVA_OPTIONS% -Xverify:none
goto continue
:sun_prod_mode
set JAVA_VM=-server
set MEM_ARGS=-Xms512m -Xmx512m -XX:MaxPermSize=512m -XX:+UseSpinning
goto continue


Now D:\OBIEE11G\wlserver_10.3\server\bin
Edit installSvc.cmd and add the parts in bold

rem *** Set Command Line for service to execute within created JVM
@echo off
set JAVA_VM=-server
if "%ADMIN_URL%" == "" goto runAdmin
@echo on
set CMDLINE="%JAVA_VM% %MEM_ARGS% %JAVA_OPTIONS% -classpath \"%CLASSPATH%\" -Dweblogic.Name=%SERVER_NAME% -Dweblogic.management.username=%WLS_USER% -Dweblogic.management.server=\"%ADMIN_URL%\" -Dweblogic.ProductionModeEnabled=%PRODUCTION_MODE% -Djava.security.policy=\"%WL_HOME%\server\lib\weblogic.policy\" weblogic.Server"
goto finish

and then on the last line add a log file for help in debug.
rem *** Install the service
"%WL_HOME%\server\bin\beasvc" -install -svcname:"beasvc %DOMAIN_NAME%_%SERVER_NAME%" -javahome:"%JAVA_HOME%" -execdir:"%USERDOMAIN_HOME%" -maxconnectretries:"%MAX_CONNECT_RETRIES%" -host:"%HOST%" -port:"%PORT%" -extrapath:"%EXTRAPATH%" -password:"%WLS_PW%" -cmdline:%CMDLINE%
-log:"D:\OBIEE11G\user_projects\domains\bifoundation_domain\servers\AdminServer\Weblogic_server_output.txt"
ENDLOCAL

The last line starting log points to a file you appoint that will be the destination of your log output. The contents of this file are what you would normally see when starting OBIEE manually from the start menu.

It may be worth considering setting the file destination to be in a new directory (with no subdirectories) and sharing and setting permissions so that the contents can be viewed without having to go to the server.

Creating the Windows Service for OBIEE

Create a file called installService.cmd with the following contents, once again, assume that the install MW_HOME for your install is D:\OBIEE11G

SETLOCAL
set DOMAIN_NAME=AdminServer
set USERDOMAIN_HOME=D:\OBIEE11G\user_projects\domains\bifoundation_domain
set SERVER_NAME=AdminServer
set PRODUCTION_MODE=true
cd %USERDOMAIN_HOME%
call %USERDOMAIN_HOME%\bin\setDomainEnv.cmd
call "D:\OBIEE11G\wlserver_10.3\server\bin\InstallSvc.cmd"
ENDLOCAL


Run the installService.cmd. This creates a service that will automatically start the AdminServer component of OBIEE. If you have opted for a simple install then your analytics will be available once the service has fully started.
Tuesday, 22 May 2012

Analytics on port 80 - Changing the listen port

By default OBIEE installs on port numbers 7001 for the console and enterprise manager, and then depending on your install option, Simple install is also on port 7001 and the enterprise install defaults the (for those of us from OBIEE 10 days) 9704.

It is however possible to change the listen port after install, now I wouldn't recommend doing this if you've done a simple install, you start to find that you end up chasing down endless changes just to get things working seamlessly.

Your best option is to go for a fresh install and choose enterprise (not simple) as your install option. A few screens further in you get the chance to customise your install ports or accept the default.

Pause here and search for a file in the install media called staticports.ini, this is the template file for port configuration. An example follows:

[WEBLOGIC]
 
#The Domain port no. This is the listen port of Weblogic Adminserver for the domain.
Domain Port No = 7001
 
#The "content" port for the BIEE apps. This is the Weblogic Managed Server port on which BIEE applications are deployed.
Oracle WLS BIEE Managed Server Port No = 9704
 
#The SSL port for the Weblogic Managed Server
Oracle WLS BIEE Managed Server SSL Port No = 9804
 
[OPMN]
 
#Process Manager Local port no
Oracle Process Manager Local Port No = 6700
 
#Process Manager Remote port no
Oracle Process Manager Remote Port No = 6701
 
#Process Manager Request port no
Oracle Process Manager Request Port No = 6702
 
[BIFOUNDATION]
 
#The listen port for OracleBIServer component 
Oracle BI Server Port No = 9703
 
#The monitor port for OracleBIServer component 
Oracle BI Server Monitor Port No = 9701
 
#The listen port for OracleBIPresentationServices component 
Oracle BI Presentation Services Port No = 9710
 
#The listen port for OracleBIScheduler component 
Oracle BI Scheduler Port No = 9705
 
#The monitor port for OracleBIScheduler component 
Oracle BI Scheduler Monitor Port No = 9708
 
#The script RPC port for OracleBIScheduler component 
Oracle BI Scheduler Script RPC Port No = 9707
 
#The listen port for OracleBIClusterController component 
Oracle BI ClusterController Port No = 9706
 
#The monitor port for OracleBIClusterController component 
Oracle BI ClusterController Monitor Port No = 9700
 
#The listen port for OracleBIJavaHost component
Oracle BI JavaHost Port No = 9810
 
[ESSBASE]
 
#The listen port for Essbase Agent
#Essbase Agent Port No = 1423
 
#The listen port for Essbase Studio
#Essbase Studio Port No = 5300

You would change the port configuration for analytics from 9704 to 80, then save the file somewhere you can browse to.

When your install is done analytics will be on http://myserver/analytics, and the console and enterprise manager are on port 7001.

Saturday, 19 May 2012

OBIEE 11G - Changing Your Password

The Challenge 

There is always more than one way to do something. Setting up the functionality to change your password in OBIEE 11G is no different.

Our experience proved that it is not technically challenging, all the documentation is there, you merely have to spend an hour or so gathering all the facts, doing a little research, and then the fun starts.

Our Solution

We decided to deploy a JSP and class as a WAR. Mainly because that is something we could achieve and where our experience lay.

We are currently running OBIEE 11.1.1.6 so a careful hunt through the compatibility matrix reveals that Jdeveloper 11.1.2.1 is a good match.

Coding the Java Class

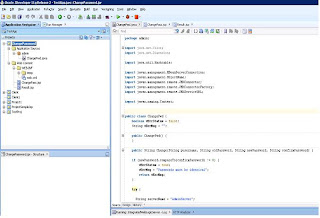
In essense we are going to make a connection to the security mbean and invoke a changeUserPassword


invoke(securityMBeanName,"changeUserPassword",objuser, objstr);

So fire up JDeveloper and lets start


Calling the JSP

We will create a narrative report and use the Session Variable  USER as a parameter in our URL call to the JSP.

The JSP

So we have coded and tested our class now we need a JSP that will use the class. From the narrative report we know the user name and now we can concentrate on the password change functionality. 
We use 3 fields Old Password, New Password and Repeat New Password. By using a web page we have the ability to obscure the characters being entered.

Deploying the WAR 

Wrap everything JSP and Class in a WAR - fortunately this is nearly a one click operation in JDeveloper.

Place the WAR file in a directory on the OBIEE server and deploy using the console. 

You can then call your password change using the narrative report.

Tuesday, 15 May 2012

Simple Install of OBIEE 11.1.1.6 on Windows 64 bit

After downloading the zip files from Oracle: and completing
the repository creation
and setting up the loopback adapter.

Extract all 5 disks to the same directory and accept the warning

When all disks are unpacked you should have one directory bishiphome containing 5 numbered disks. Navigate to disk1 and click setup.exe

The OBIEE install wizard will start. This process will take at least 90 minutes.

Click next and skip software updates

Accept Simple Install.

The prerequisite checks should run.

Set the middleware home to D:\OBIEE11G

Set the weblogic password

Conform all the modules to be installed

Set the biplatform credentials

And then similarly the MDS credentials
Ignore the updates

You are now ready to install

Click install

First the files are copied in and patches applied
This takes around 45 minutes

Followed by the configuration of the OBIEE instance

Click next

Save the install details and finish

OBIEE should now attempt to start in the browser.

Monday, 14 May 2012

Installing OBIEE 11.1.1.6 Loopback Adapter on Windows Server 2008 64bit.

Installing the loopback adapter

Click on start and right click on Computer and select Properties to get to the System control Panel

Select device manager

Right click on the computer name and add legacy hardware.

Install the hardware manually

Select network adapters from the list

Microsoft --> Loopback adapter

click next

Then click finish on the wizard

Now open the network and sharing Center

And select Change adapter settings

Right click the loopback adapter and select properties
We will be altering the Internet Protocol Version 4 (TCP/IPv4) settings

Set the IP address to be non navigable 10.10.10.10
And the subnet mask to 255.255.255.0
Now close the Properties

You can test this by opening a command window and running ipconfig /all


Part of the output will show your loopback settings.

The loopback adapter should be set up and running


Sunday, 13 May 2012

Installing OBIEE 11.1.1.6 RCU on Windows Server 2008 64bit.


The Repository Creation Utility


Copy across the Repository Creation Utility RCU and the 5 zipped disks for the OBIEE install to a directory on E:

Creating the repository.


Unpack the RCU and navigate to /rcuHome/bin and run rcu.bat

Select Create

Enter the server and connection details 

You will then have a confirmation box with all prerequisites ticked.

Create an new prefix for your install and select Oracle Business Intelligence from the boxes below.

Another confirmation box

Set the schema passwords

Either allow the default tablespace creation or remap to existing tablespaces.

Another confirmation box

Click create.

Click close and you’re done.

Wednesday, 9 May 2012

OBIEE 11G and tnsnames.ora

Where do I put tnsnames.ora in OBIEE 11G?

In versions of OBIEE prior to 11g you would use the tnsnames of the Oracle client and the tnsnames would be found in the network/admin directory.

In OBIEE 11G you can place your tnsnames file directly into the middleware_home/Oracle_BI1/network/admin directory.

Works for me.

Update:

You can connect WITHOUT a tnsnames file.

OBIEE 12c uses a different directory

Friday, 4 May 2012

Oracle BI Publisher Trial Edition 11.1.1.6 is now available on OTN!

Oracle BI Publisher Trial Edition 11.1.1.6 is now available on OTN!
• Small, lightweight download (~600 MB)
• 5 minute Install - fully configured and running
• Getting Started Tutorial
• Quick Start Guide
• 29 new Samples (over 60 total) fully indexed with feature descriptions

BI Publisher Trial Edition is not supported for production deployments. You can save any reports developed on the Trial Edition and upload to your production environment.

You can download BI Publisher Trial Edition from the following link:
http://www.oracle.com/technetwork/middleware/bi-publisher/downloads/index.html